Routing -> QoS -> QoS Classification -> New
Assignment of QoS filter to QoS class or high priority class |
In the next configuration step the created filters are assigned to the high priority class. For this, go to the following menu:
Go to Routing -> QoS -> QoS Classification -> New.
Routing -> QoS -> QoS Classification -> New
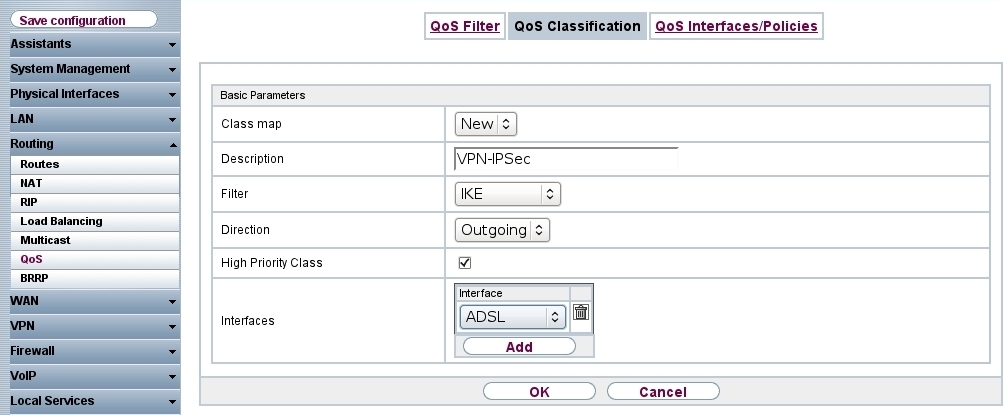
Proceed as follows in order to create a new class map:
For Description enter a description for the class map, e.g. VPN-IPSec .
Select Filter from what you have configured in the Routing -> QoS -> QoS Filter menu, e.g. IKE .
Under Direction select Outgoing .
Enable the High Priority Class. The data packets are then allocated to the class with the highest priority.
Select the Interface via which the prioritised data is to be sent, e.g. ADSL .
Confirm with OK.
For each QoS Filter the QoS class assignment (High Priority Class) must be done separately. When assigning the remaining QoS filters (ESP, NAT-T_1 and NAT-T_2) the class map is set to the newly created VPN-IPSec entry. For this, go to the following menu:
Go to Routing -> QoS -> QoS Classification -> New.

Routing -> QoS -> QoS Classification -> New
Proceed as follows to assign additional QoS filter to the class map:
Select the Class map (e.g. VPN-IPSec ) which the QoS filter should be asigned.
Select the next Filter , e.g. ESP .
For Direction select Outgoing .
Enable the High Priority Class.
Press OK to confirm your entries.
Assign all generated QoS filters to the new class map VPN-IPSec .
Results:

Routing -> QoS -> QoS Classification
| Copyright© Version 01/2020 bintec elmeg GmbH |