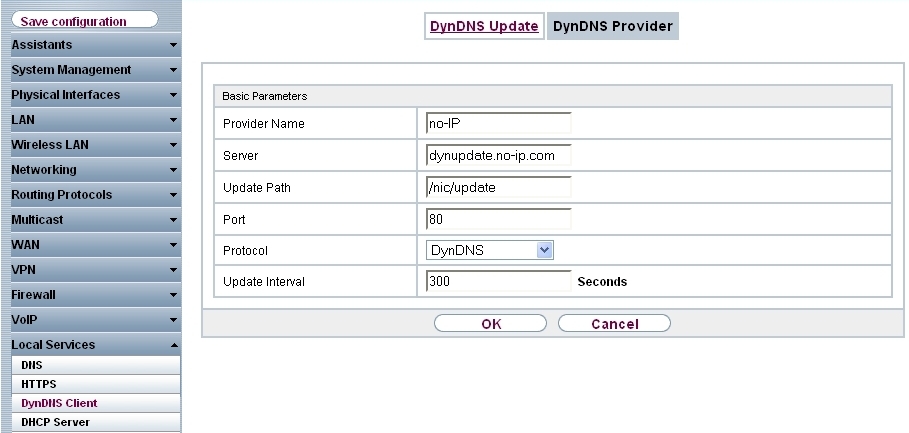
Local Services -> DynDNS Client -> DynDNS Provider -> New
New Provider |
If you would like to use a DynDNS provider not yet included in the list under the menu option Local Services -> DynDNS Client -> DynDNS Provider, you must add this via the following menu:
Go to Local Services -> DynDNS Client -> DynDNS Provider -> New.
Local Services -> DynDNS Client -> DynDNS Provider -> New
Relevant fields in the DynDNS Provider menu
| Field | Meaning |
|---|---|
| Provider Name | Give the provider a name. |
| Server | Enter the IP address or domain names of the update server. |
| Update Path | The path to the registration script. |
| Port | Enter the port via which the client receives the update. |
| Protocol | The protocol used by the DynDNS provider. |
Proceed as follows:
Enter a Provider Name, e.g. no-IP .
Enter dynupdate.no-ip.com for Server.
Enter /nic/update under Update Path.
Leave the Port set to 80 .
Select DynDNS for Protocol.
Confirm with OK.
| Copyright© Version 01/2020 bintec elmeg GmbH |