Local Services -> DynDNS Client -> DynDNS Update -> New
Configuring DynDNS |
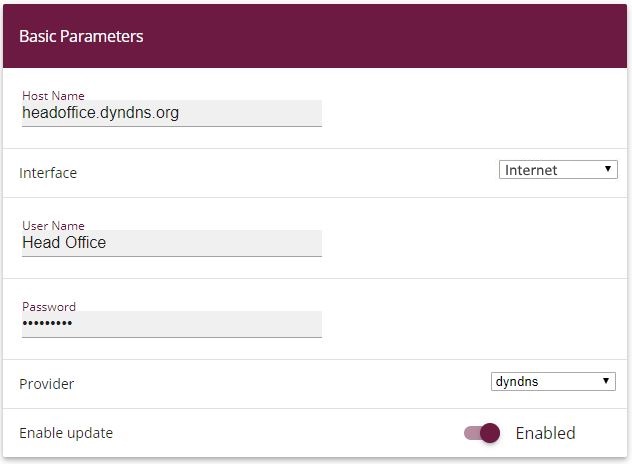
Create an entry in the gateway for your registered DynDNS name, e.g. headoffice.dyndns.org .
For this, go to the following menu:
Go to Local Services -> DynDNS Client ->DynDNS Update-> New.
Local Services -> DynDNS Client -> DynDNS Update -> New
Proceed as follows:
Under Host Name enter the complete host name you have registered, e. g. headoffice.dyndns.org .
Select Interface, e.g. Internet .
Under User Name enter Head Office for example.
Under Password enter password for example.
Leave Provider set to dyndns .
Activate Enable Update.
Confirm with OK.
Once you have configured the IPSec tunnel and the DynDNS entry, you should carry out a connection test. If successful, now change the authentication parameters as follows: A certificate is requested and imported.
| Copyright© Version 01/2020 bintec elmeg GmbH |