-
Go to Wireless LAN Controller -> Slave AP configuration -> Radio Profiles.
-
Where you have the existing entry <2.4 GHz Radio Profile> , click the
 symbol.
Configure Radio Profiles |
In the next step, the Radio Profiles are edited. You configure the Radio Profiles by editing the default entry.
Go to Wireless LAN Controller -> Slave AP configuration -> Radio Profiles.
Where you have the existing entry
<2.4 GHz Radio Profile> , click the
symbol.

Wireless LAN Controller
-> Slave AP configuration-> Radio
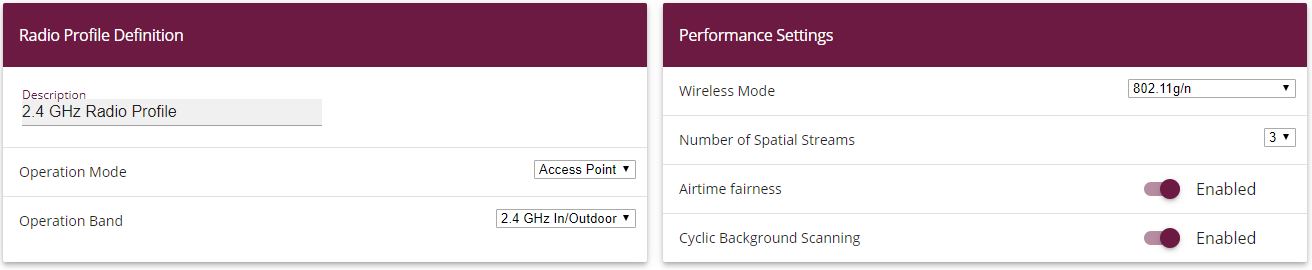
Profiles-> <2.4 GHz Radio Profile>
Proceed as follows:
The wireless module profile's frequency range is left at 2.4 GHz In/Outdoor .
Change the Wireless Mode to 802.11g/n .

|
Note |
|---|---|
|
The result of changing the wireless mode is that older WLAN devices which are only based on the 802.11b transmission standard will no longer be able to use the WLAN. The main advantage of doing this, however, is to prevent any automatic reduction in bandwidth once a 802.11b is connected. |
|
Enable the option Burst Mode to increase the transmission speed.
Click Advanced Settings.
Select the Channel Plan you require. User-defined enables you to select the channels you require yourself.
Under User-defined, select as the permitted channels 1 , 5 , 9 and 13 . This channel plan is the recommended ideal channel plan for every country where channels 1 to 13 are allowed and it does not have any (significant) frequency overlaps with 802.11g/n. This means that the access points have more choices for using a channel with minimal interference, which improves the performance and reliability of the entire WLAN.
Enable the Short Guard Interval function in order to reduce the guard interval (= time between transmitting two data symbols) from 800 ns to 400 ns.
The other settings remain unchanged and you save and leave the configuration menu with OK.
All the necessary profiles have now been set up in the WLAN controller.
| Copyright© Version 08/2020 bintec elmeg GmbH |