Assistants -> VPN -> VPN Connections -> New
Configuration at location B (bintec be.IP plus-2) |
Add a new connection to the VPN assistants. For this, go to the following menu:
Go to Assistants -> VPN -> VPN Connections -> New.
Assistants -> VPN -> VPN Connections -> New
Proceed as follows:
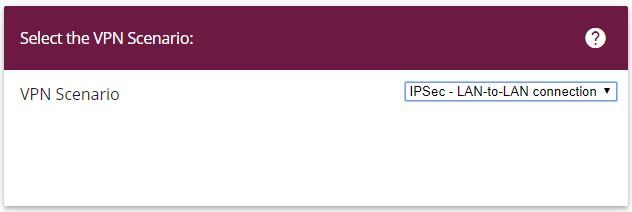
Under VPN scenario select IPSec LAN-to-LAN connection .
Click Next to configure a new VPN connection.
Enter the data required for the VPN connection.

Assistants -> VPN -> VPN Connections -> Next
Proceed as follows to configure a new VPN connection:
For example, under Description enter IPSec Peer1 .
Enter the ID of your own IPSec gateway under Local IPSec ID, e.g. be.IP_plus-2 .
For example, under Remote IPSec ID enter be.IP_plus-1 .
Under Preshared Key enter, for example, secret for authentication. The preshared key must be identical on both sides.
Select the Local IP Address of the gateway, for example 192.168.1.254 .
Leave Define this connection as default route set to disabled.
Under IPSec Peer Address enter the IP address or host name of the remote IPSec partner, e. g. 10.1.1.1 .
Enter the destination address used for the connection under IP Address of Remote Network e.g. 1.1.1.1 .
Under Subnet Mask enter the host mask, e.g. 255.255.255.255 .
Press OK to confirm your entries.
To change the local IP address, select the following menu options:
Go to
VPN -> IPSec -> IPSec Peers ->
 .
.

VPN -> IPSec -> IPSec Peers ->
Proceed as follows:
Under Local IP Address enter, for example 1.1.1.2 .
Leave the remaining settings unchanged and confirm them with OK.
To create a tunnel profile, go to the following menu:
Go to VPN -> L2TP -> Tunnel Profiles -> New.


VPN->L2TP->Tunnel Profiles->New
For example, under Description enter L2TP-LAS .
Enter the ID of your own IPSec gateway under Local Hostname, e.g. be.IP_plus-2 .
For example, under Remote Hostname enter be.IP_plus-1 .
Enter the password, e.g. secret for authentication.
Enter the destination address used for the connection under Remote IP Address e.g. 1.1.1.1 .
Click Advanced Settings.
Enter the Local IP Address, e.g. 1.1.1.2 .
Leave the remaining settings unchanged and confirm them with OK.
A user must be configured in the next step. For this, go to the following menu:
Go to VPN -> L2TP -> User -> New.


VPN->L2TP->Users->New
To create a new user, proceed as follows.
For example, under Description enter L2TP-LAS .
Select the Connection Type LNS .
Under User Name enter L2TP-User for example.
Enter the password, e.g. secret .
Enter the Local IP Address, e.g. 1.1.1.4 . To avoid conflicts with other interfaces or existing routes, the local IP address must be unique.
Under Route Entries enter the remote IP address, e.g. 1.1.1.3 and the netmask e.g. 255.255.255.255 .
Click Advanced Settings.
Under Encryption click None . As a secure IPSec connection already exists, additional encryption is not required.
Leave the remaining settings unchanged and confirm them with OK.
To enable bridging between the LAN interface and the L2TP interface, both interfaces must be assigned to a bridge group. For this, go to the following menu:
Go to System Management -> Interface Mode / Bridge Groups -> Interfaces.

System Management -> Interface Mode / Bridge Groups ->Interfaces
Proceed as follows:
Under Mode / Bridge Group select New Bridge Group . In our example, the interface en1-0 is used as the LAN interface.
Under Configuration Interface select en1-0 .
Confirm with OK. After clicking OK, a new bridge group is created automatically.
If no bridge group exists, the new interface uses the alias br0 (otherwise br1 , br2 , etc.).
The configuration looks like this:

System Management -> Interface Mode / Bridge Groups ->Interfaces
Now is assigned to the newly created bridge Grupppe the L2TP interface. For this, go to the following menu:
Go to System Management -> Interface Mode / Bridge Groups ->Interfaces -> Add.

System Management -> Interface Mode / Bridge Groups ->Interfaces -> Add
Proceed as follows:
Under Mode / Bridge Group select the WAN-Partner L2TP-LAS .
Confirm with OK.
To enable bridging between the LAN interface and the L2TP interface, both interfaces must be assigned to a bridge group. For this, go to the following menu:
Go to System Management -> Interface Mode / Bridge Groups ->Interfaces.

System Management -> Interface Mode / Bridge Groups ->Interfaces
Proceed as follows:
Under Mode / Bridge Group select br0(192.168.1.254) .
Confirm with OK. After clicking OK, a new bridge group is created automatically.
This concludes the configuration of the bintec be.IP plus™ gateway as location B.
| Copyright© Version 08/2020 bintec elmeg GmbH |